
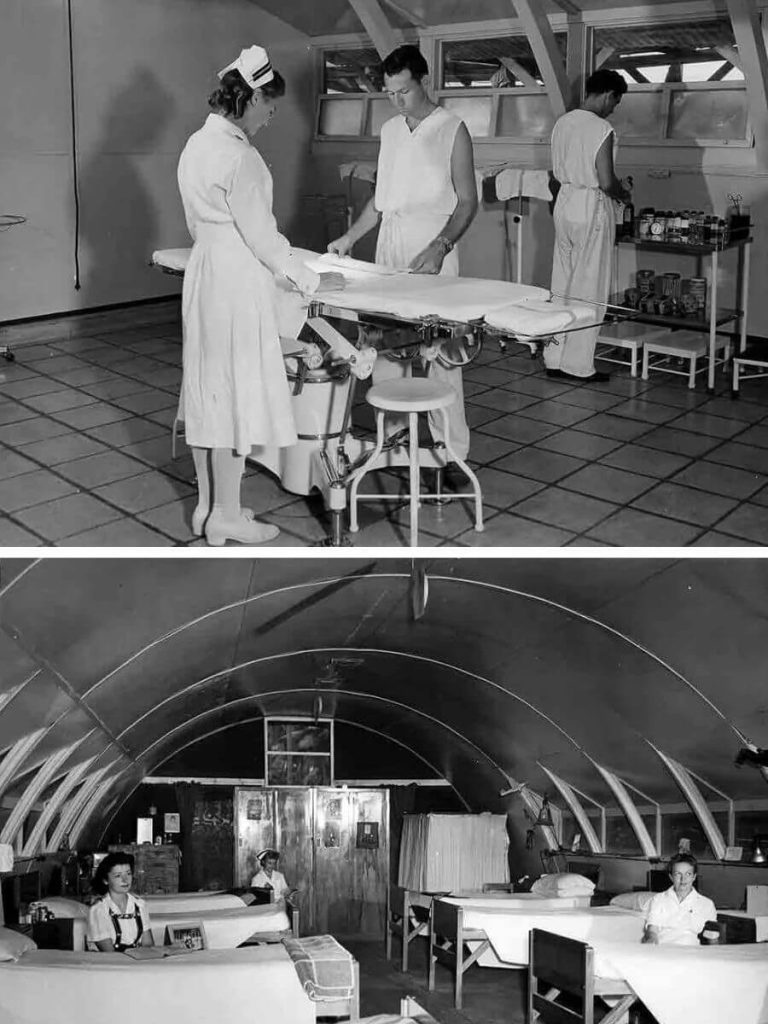
Located amidships aboard the SS President Coolidge, Cargo Hold 4 offers a fascinating contrast to the ship’s forward cargo holds. Unlike Cargo Holds 1 and 2, this section has no overhead deck hatch for entry — originally, access was through large twin doors on the port and starboard sides, now rusted closed.
During her years as a luxury ocean liner, Cargo Hold 4 was primarily used for transporting motor vehicles. On her final voyage as a World War II troop transport, the hold was repurposed to carry a significant volume of medical supplies and military equipment, much of it intended to support Allied troops stationed at Guadalcanal.
Following the sinking, US Navy divers recovered a large portion of these supplies, including sulfa drugs, penicillin, morphine, vitamin K, plasma and surgical sutures. Most notable among the cargo was quinine, an anti-malarial drug of which the Coolidge was carrying an estimated 235–268 kilograms (519–591 pounds) — equivalent to roughly 250,000 doses and a major portion of the U.S. military’s anti-malarial reserves in the Pacific at the time.
For the full story read our complete history of the SS President Coolidge.
Every dive through medical supplies is planned according to the divers’ certification, experience, gas supply and the conditions on the day. The following describes a typical guided route through one of the SS President Coolidge’s most historically significant cargo spaces.
The dive begins with a descent down the bow mooring line, followed by a swim along the starboard side of the wreck. Entry into the Coolidge is typically made through the sternmost salvager’s cut on Deck E, descending directly into Cargo Hold 4.
Crossing over onto Deck D, divers pass beneath the ship’s winches before continuing towards the stern, where scattered glass jars come into view.
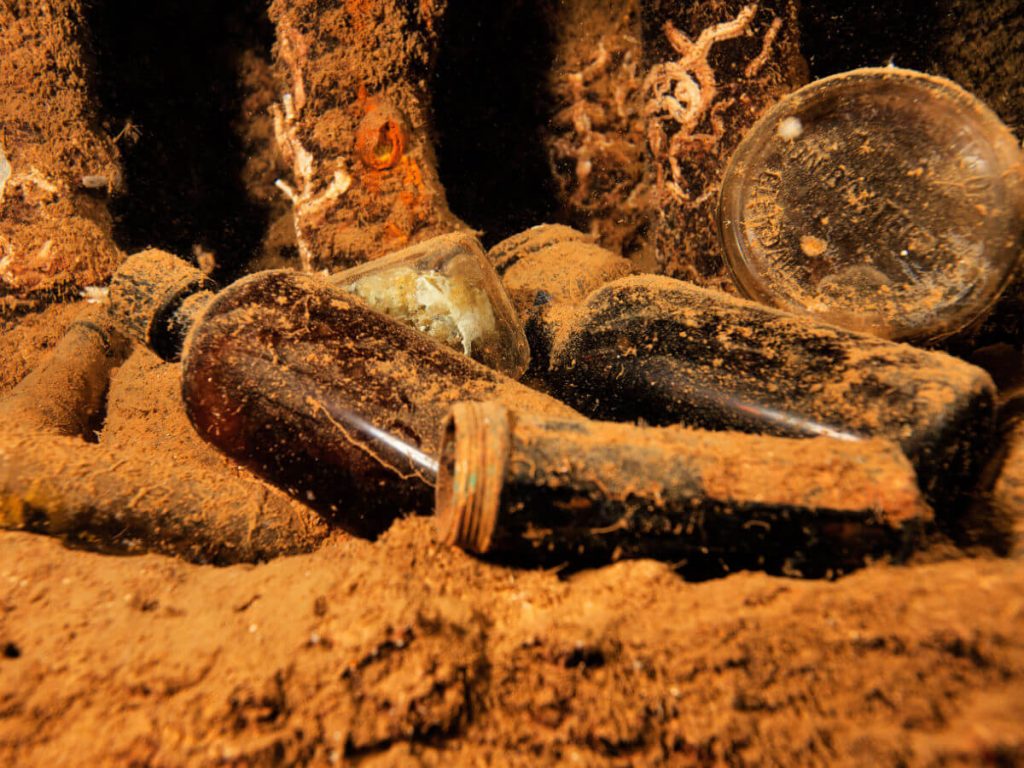
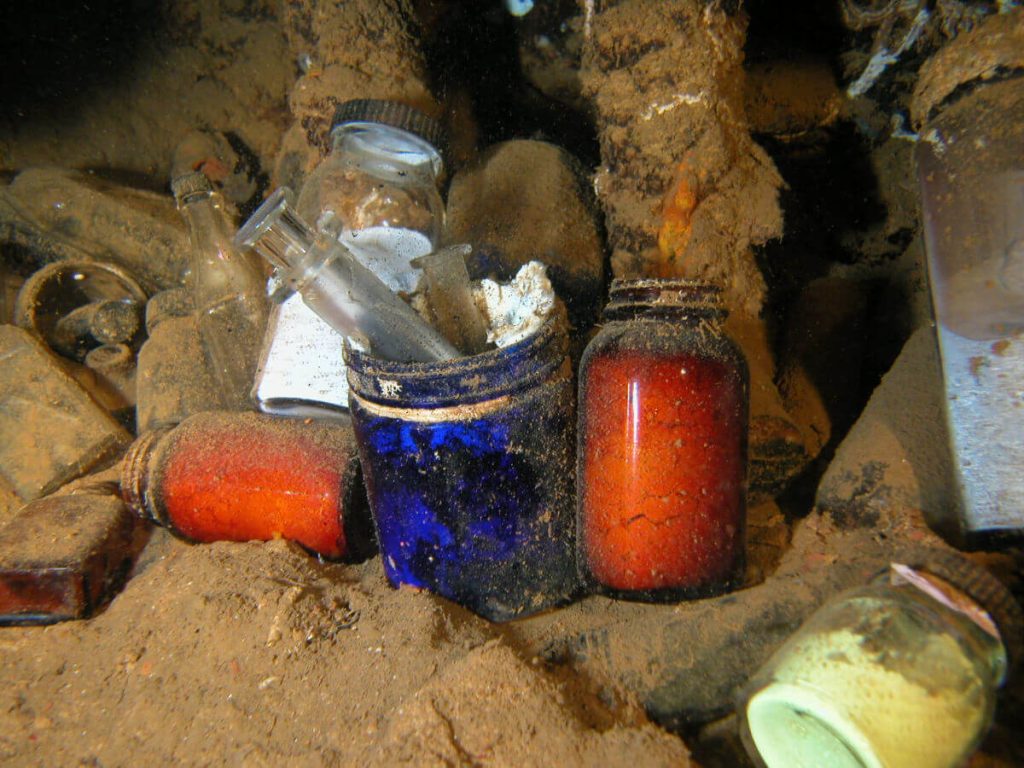
As the wreck now lies on her side, much of Cargo Hold 4’s original contents fell into the silt below over the decades. However, divers have since recovered several of these jars and placed them onto what was once the ceiling beams on your right hand side, creating the well-known medical supply tray that now rests at almost exactly 30 metres.
Inside the bottles, divers can sometimes make out:
This is a tight space, so divers proceed single file down to the tray before circling back the way they came towards the bow.
From here, the route crosses back over Deck E into Deck F, passing through a small restriction between two beams into a long passageway. Along the deck side, the original wall has fallen away, opening the corridor to natural light from outside.
Along the ceiling of this section, divers may spot small glass ampoules of white powder believed to be quinine, part of the vast anti-malarial cargo carried aboard the Coolidge’s final voyage. Because these vials contain a pocket of trapped air, they have floated upward over the decades and become lodged against the ceiling. Divers can search them out and gently pull them free, but once released they will shoot straight back up to the ceiling again. If you’d like to try this for yourself, make sure to release the vial well away from the opening in the wall, to avoid it floating out of the wreck and being lost.
Continuing along the corridor, the route passes over Cargo Hold 2 through a further tight restriction. Above, a single shell can be seen lodged against the ceiling, having floated upward as it still appears to retain air inside. As its condition is unknown, divers should give it a wide berth and avoid disturbing it. The route then descends into Cargo Hold 1, exiting through the main cargo hatch.
Depending on gas reserves and no-decompression limits, the remaining bottom time is typically spent exploring the starboard side of the bow before beginning the ascent. Divers can return via the bow mooring line or follow the sandy slope towards the coral gardens, where the safety stop is completed in shallow water.
If you’d like to dive this site with Triton Explorers, get in touch with your preferred dates and the dives you’d like to do. If you don’t yet have the certification required for a particular dive, let us know — we can advise you on your options and, where possible, arrange the training you need.
Once we’ve confirmed your dives and availability, we’ll send you a digital check-in to complete before your arrival. A 50% deposit secures your dive slots, with the remaining balance payable before or on your arrival.
Then, all that’s left to do is turn up, gear up and go diving.


